Denim hardware is a working part of the garment, not decoration added after the jeans are finished. A tack button closes the waistband under tension. Rivets reinforce selected stress points. A fly zipper must run smoothly after sewing, washing and repeated wear. Studs, buckles, snaps and metal badges must remain attached without cutting the fabric, staining the wash or creating an unsafe edge.
Most hardware failures begin before the setting machine is switched on. A button post is chosen without measuring the compressed waistband stack. A zipper finish is approved on a dry component card but not tested in the intended bleach wash. A decorative rivet is moved during sampling, yet the reinforcement underneath is not moved with it. The bulk garment may look correct at packing and fail only after the first home laundry cycle.
This guide is for fashion brands, technical designers, product developers and sourcing teams specifying custom jeans, jackets, skirts, shorts and overalls. It explains how to select, document, sample, test and inspect denim fasteners and metal trims without treating one passing pull-test number as proof that the whole system is reliable.
Treat Denim Hardware as a Complete System
A denim hardware component never works alone. Its performance depends on the component, mating part, fabric, interlining, thread, hole, seam allowance, setting equipment, operator and finishing process. Changing any one of these variables can turn an approved item into an unstable attachment.
A useful denim hardware review separates four questions:
- Is the component itself suitable? Check dimensions, material, finish, edge quality and mechanical construction.
- Is it compatible with the garment? Check fabric thickness, stretch, reinforcement, location and the loads created in wear.
- Is it attached correctly? Check hole size, post length, die alignment, setting pressure and damage around the attachment.
- Does the assembled system survive processing and use? Check washing, abrasion, corrosion, repeated operation and required chemical limits.
This distinction matters during denim hardware root-cause analysis. A loose waistband button may be a defective button, but it may also have the wrong tack length, an oversized pre-punched hole, inadequate waistband reinforcement or a setting die that does not match the cap profile. Reordering the same button will not correct the other causes.
The denim hardware system should be approved in the intended size range as well. A waistband stack can change where belt loops, fly shields or extended tabs meet. The smallest and largest sizes may use different zipper lengths or place decorative components over different seam geometry. Connect the hardware plan to the jeans size grading rules rather than issuing one placement page for every size.
Jeans Tack Buttons
The familiar jeans waistband button is commonly a tack-attached component. The visible button body joins with a tack or nail that passes through the waistband material. Supplier terminology varies, so a bill of materials should show a photograph or drawing of both parts rather than relying only on the word “button.”
What the button must do
The button must remain secure under opening, closing and waistband tension. Its cap should resist denting during setting and washing. The tack should lock into the button without leaving a sharp projection. The assembly should sit square to the waistband and allow the buttonhole to pass over it without excessive force.
Diameter changes both appearance and function. A larger button can strengthen the brand signal but may require a larger buttonhole and more force to operate. A small button may look refined yet feel difficult to grip on a rigid waistband. Check diameter, cap height, shank clearance and buttonhole dimensions together.
One-piece and two-piece appearances
Some caps show the base metal and stamped logo directly; others use a separate decorative shell, enamel face or inserted badge. More layers create more interfaces that can loosen, trap process residues or change appearance under impact. The approval sample should be tested as supplied, including any coating, inlay or logo construction.
Logo execution
Debossed, embossed, laser-marked, engraved and printed logos behave differently. Fine text that looks sharp in artwork can fill during casting or become unreadable after antique finishing. Specify minimum line width with the hardware supplier, approve a physical strike-off and retain a signed master. A screen rendering cannot show edge sharpness, relief depth or plating variation.
Tack length
The correct tack is selected against the compressed material stack, not the nominal fabric weight. A waistband may contain shell fabric, facing, interlining, seam allowances, pocketing and a belt-loop end. Too short a tack may not engage fully. Too long a tack can bottom out, leave movement, distort the cap or create an internal point.
Measure and test the actual production construction after wash. Soft fabric can compress more under setting than rigid resin-finished denim. If the waistband stack changes by size or style, document the approved tack for each configuration.
Jeans Rivets and Burrs
Rivets were introduced to reinforce high-stress areas of work trousers and remain part of the visual language of jeans. In current fashion products, a rivet can be functional, decorative or both. The technical specification should say which role it performs.
Where rivets belong
Common positions include the ends of front-pocket openings, coin-pocket corners and selected workwear details. A rivet can distribute load across a local area, but making a hole also interrupts the fabric. If the cloth is lightweight, highly elastic, heavily abraded or cut close to an edge, the rivet may become the start of a tear instead of reinforcement.
Review the layers under every position. Pocket facing and pocket bag should lie flat. Seam allowances should not create a tilted stack. When extra reinforcement is required, show its size, material and position in the construction drawing.
Rivet dimensions
Specify cap diameter, stem or post dimensions, mating part and finished projection. Two rivets that look similar from the outside may use different locking geometries. Mixing parts from different articles or suppliers can create an assembly that appears set but separates under load.
Open versus covered back
The inside face affects comfort and appearance. An exposed burr or back may be acceptable in a traditional jean when it is smooth and correctly formed. A covered or capped construction may suit products where the hardware contacts skin or delicate layers. Approval should include both outside and inside photographs.
Decorative rivets
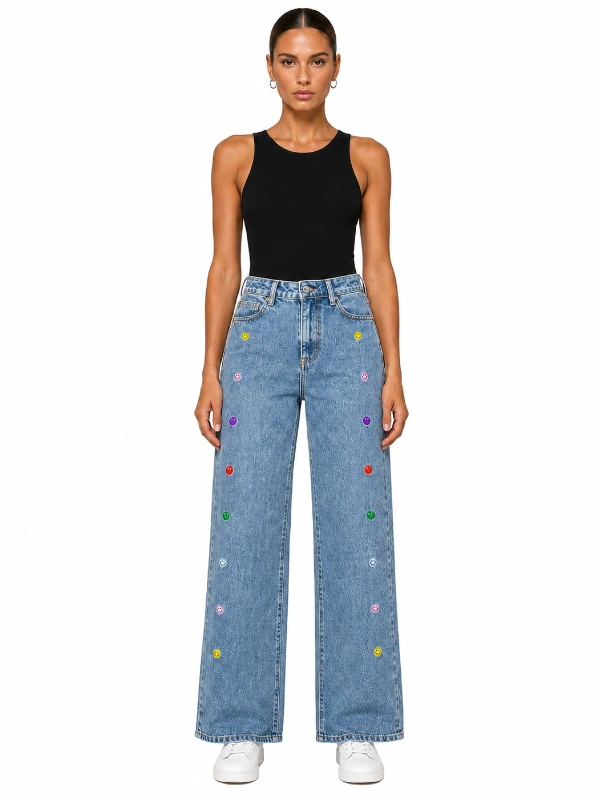
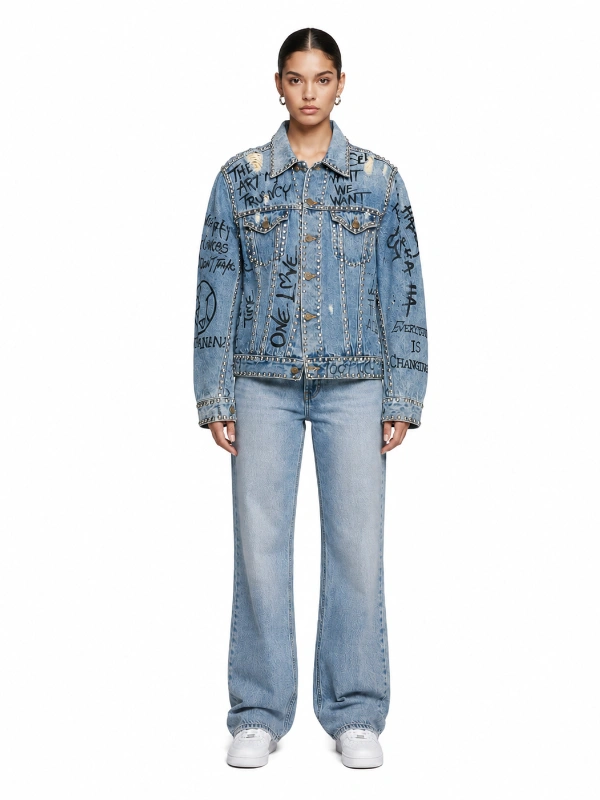
Decorative pieces placed across a leg or jacket panel introduce repeated holes and local weight. Check fabric distortion, snagging, contact comfort and loss during wash. Dense layouts need a placement template and a clear rule for the number of missing, loose or misaligned pieces permitted at inspection.
Fly Zippers and Sliders
Within a denim hardware program, the jeans fly zipper is a small assembly with several failure points: tape, chain or teeth, slider, puller, top stops, bottom stop and the sewing that joins it to the fly. The slider must move under realistic lateral tension while the fly remains flat and the puller stays accessible.
Metal, molded plastic and coil chains
Metal teeth are strongly associated with traditional jeans and can complement tack buttons and rivets. Molded plastic or coil constructions may suit lightweight garments, special finishes or cost targets. Selection should consider appearance, chain strength, flexibility, wash exposure and repair expectations rather than a generic hierarchy of quality.
Closed-end fly construction
Most jeans flies use a closed-end zipper. Confirm overall length, chain length, top-stop position, bottom-stop dimensions, tape width and slider type. Factories and zipper suppliers may define zipper length from different reference points. The tech pack should include a dimensioned drawing or approved physical sample.
Slider lock and puller
A locking slider helps prevent the fly from opening unintentionally. Test the zipper in the sewn garment, not only flat on a table. The fly construction places the chain under side load, and an overly tight pattern or uneven sewing can make an acceptable zipper difficult to operate.
Custom pullers add branding but also mass and leverage. A long puller can strike the washer drum, scratch nearby hardware or exceed the strength of the slider attachment. Check edge quality, orientation and movement after the full finish.
Zipper tape
Tape color should remain visually compatible with the washed garment, especially at the top of the fly and inside construction. Test shrinkage, staining and color change. A tape that shrinks more than the denim can cause rippling; one that absorbs process chemistry can transfer color or retain an odor.
Length by size
Rise and fly length may change across sizes, while zippers are ordered in discrete lengths. Establish size groups in the graded bill of materials and confirm that each zipper matches the corresponding fly pattern. Do not allow operators to trim or substitute lengths without an approved method.
ASTM D2061-07(2021) covers several strength tests for zippers, while ASTM D2062 addresses operability. A buyer should select properties relevant to the garment and agree limits with the supplier; the existence of a standard does not create one universal pass value for every jean.
Other Denim Hardware: Snaps, Hooks, Buckles and Metalwork
Snap fasteners
A snap combines cap, socket, stud and post or prong-ring components. The parts must be ordered as a compatible set and attached with matching dies. Review opening and closing force, alignment, fabric damage and holding strength. A snap that is too strong can tear lightweight denim; one that is too weak can open during wear.
ASTM D7142-05(2021) covers holding strength of prong-ring attached snap fasteners. It evaluates a particular construction and should be applied with agreed sampling and performance requirements.
Hooks and bars
Hooks can create a clean trouser-style waistband but need stable reinforcement and careful placement. Check whether the hook edge contacts skin, whether the bar rotates and whether the waistband remains aligned under tension. The assembly should be tested closed on the finished garment.
Buckles and adjusters
Buckles appear on overalls, waist adjusters, belts and design straps. Specify internal width against the strap thickness and width. Test slip under load, edge abrasion, coating durability and orientation. A buckle can meet dimensional requirements and still cut a raw-edged strap during movement.
Eyelets and grommets
Eyelets create controlled openings for lacing, ventilation or decoration. Their barrel length and washer must match the compressed material. Inspect rolling or clinching on the reverse side for splits and sharp edges. Reinforce the hole where the lacing load or fabric structure requires it.
Studs, crystals and metal badges
Decorative attachments should be evaluated for more than initial appearance. Consider local weight, snagging, skin contact, sharp points, orientation, abrasion against adjacent garments and loss during laundry. A badge attached with multiple legs needs all legs fully formed; one poor leg can allow rotation before the whole item detaches.
Base Materials and Surface Finishes
Denim hardware suppliers work with brass, copper, steel, stainless steel, zinc alloys, aluminium and polymer components, among other materials. The visible color may come from plating, chemical conversion, paint, enamel, lacquer or an antique treatment rather than the base material itself.
The correct choice depends on function, weight, cost, design and processing. Brass can support detailed stamping and traditional finishes. Steel can provide strength but needs appropriate corrosion protection. Zinc alloy supports complex cast shapes but can be brittle in thin sections. Aluminium is light but behaves differently under impact and finishing. A material name alone does not guarantee performance; alloy, geometry and process matter.
Finish language must be controlled
Names such as antique brass, gunmetal, old silver and matte black are visual descriptions, not universal recipes. One supplier’s antique silver may be another supplier’s black nickel. Approve a physical master under neutral light and assign an internal finish code.
Record whether variation is intentional. Antique finishes often reveal high points and retain darker color in recesses. The acceptable range should distinguish designed variation from patchy plating, exposed base metal, stains or corrosion.
Mixed metal appearance
Button, rivet, zipper teeth, slider and badge are produced by different processes and may not match perfectly even when ordered under one color name. Review them together on the garment. A small controlled difference can look deliberate; an unplanned mix of warm and cool metallic tones can look like substitution.
Coating thickness and logo definition
Heavy coating can soften fine logo relief or alter component fit. Thin or poorly prepared coating can expose base metal at edges after setting. Approve the finished production route, not an unplated sample followed by a verbal color instruction.
Engineer the Attachment, Hole and Setting Process
Correct denim hardware attachment begins with the material stack. Create a cross-section for each critical location and count every layer. Include shell fabric, pocketing, fusible, facing, seam allowance, patch and embroidery backing. Measure after the intended wash when the material compresses or shrinks significantly.
Reinforcement
Interlining, woven tape, extra denim or a pocket-facing layer can spread load. Reinforcement should be large enough to extend beyond the attachment, stable in washing and compatible with the hand of the garment. A small hard patch can create a visible rectangle or a new tear line around its edge.
Pre-punched holes
Hole diameter and shape must suit the post. An oversized hole removes holding material; a rough or off-center hole can start a tear. Some attachments pierce the fabric during setting, while others use a prepared hole. Follow the approved hardware and equipment method rather than substituting whichever punch is available.
Setting dies
The top and bottom dies support the component while force locks the parts. A die with the wrong profile can dent a logo cap, tilt the button or fail to form the mating part. Identify the die code with the component article, maintain the tooling and remove damaged dies from production.
Pressure and alignment
Too little setting force can leave movement. Too much can crush the component or cut the fabric. The ideal setting is not judged only by a flat cap. Inspect the internal lock, fabric compression and reverse side, then verify attachment strength. Pneumatic pressure settings are machine-specific and should be established through trials, not copied as a universal number.
Operator control
Use physical position guides and first-piece approval. Components should be counted and reconciled where loss creates safety or quality risk. Operators need a clear response for a crooked or mis-set item; pulling it out and resetting into the same damaged hole is rarely an acceptable automatic repair.
Hardware reinforcement and placement should be coordinated with seam allowances and bartacks. See the denim seam construction guide when fasteners sit near pocket ends, waistband joins or layered seams.
Approve Hardware Through the Actual Denim Wash
Denim hardware is exposed to more than home laundering. Garment finishing can combine water, heat, alkali, acid, oxidizing or reducing chemistry, enzymes, stones or alternative abrasive media, ozone, resin, tint, softener, extraction and tumble drying. Process details vary, and the same component can behave differently in two wash routes that create a similar color.
Corrosion and staining
Corrosion can appear as red rust, darkening, green or blue deposits, white products, pitting or loss of gloss depending on the material and finish. Residue can migrate into pale denim, pocketing, labels or packing tissue. Inspect around holes and under caps, not only the exposed face.
Finish loss
Some rubbing at high points may be part of an approved antique effect. Uncontrolled peeling, blistering or large areas of exposed base metal are different. Define the intended result with an approved washed sample and close-up photographs.
Impact and abrasion
Buttons, rivets and pullers strike the machine and other garments during processing. Caps can dent, logos can flatten and sharp damage can appear. Protective covers or wash bags may help in selected processes, but they can also change abrasion and process movement. The laundry method must be part of development.
Functional change
Residue can make sliders rough. Coatings can increase friction. Fabric shrinkage can place more lateral load on the fly. Snaps can become harder to open when their geometry is distorted. Operate every closure after washing and again after conditioning.
Contact marks
Protruding hardware can print or scratch the opposite garment surface during tightly packed washing or shipment. Evaluate inside-out processing, stacking and carton pressure. A defect that appears on the denim may originate from the component on the next garment.
Approve hardware on the exact base fabric and wash standard. A component that passed on a dark rinse cannot be assumed to pass an aggressive pale bleach. Use the denim wash development guide to record process versions and the denim colorfastness guide when hardware finishes, zipper tape or adjacent materials may stain.
Build a Meaningful Hardware Test Program
A denim hardware test plan starts with the failure the brand needs to prevent. It then identifies the component, assembled location, conditioning, method, direction of force, number of specimens and acceptance limit. A result without those details is difficult to compare or repeat.
Visual and dimensional inspection
Measure diameter, length, tape width or other controlled dimensions. Compare logo, finish and construction with the approved master. Inspect edges, burrs, cracks, incomplete plating, contamination and mixed components before attachment. This catches supplier issues without consuming finished garments.
Attachment or pull strength
Pull testing evaluates the assembled component and fabric system. The fixture, pulling direction and loading rate matter. ASTM D7842/D7842M-12(2021) covers holding strength of tack and prong-fastener attached buttons and can be used to evaluate compatibility with apparel fabrics.
Do not publish or adopt an arbitrary universal force because another brand uses it. Requirements depend on component, location, garment type, age group, market and risk. Establish limits through the buyer’s quality program, applicable regulations and qualified laboratory advice.
Torque or rotational security
Some components can rotate while still resisting a straight pull. Rotation may enlarge the hole, misalign a logo or loosen prongs. Where relevant, assess controlled twisting as part of the product-specific protocol.
Repeated operation
Open and close zippers, snaps, buckles and hooks repeatedly under realistic alignment. Record jamming, slider movement, opening force and component damage. Repeated cycling can reveal wear that one force-to-failure test misses.
Zipper strength and operability
Possible concerns include chain crosswise strength, slider lock, puller strength, stop retention and opening or closing behavior. Select the appropriate methods from a recognized zipper program and test the production article. A high chain-strength result does not compensate for a weak bottom stop or poorly sewn tape.
Finish durability to laundering
ASTM D2051-14(2022) covers durability of decorative zipper finishes to laundering. The brand should also run the actual industrial denim process because standard home-laundering exposure may not reproduce bleach, abrasion or laundry-machine impact used during garment finishing.
Corrosion exposure
Humidity, salt spray or other accelerated tests may be useful for selected markets and products, but their relevance should be agreed. A laboratory corrosion grade and an actual wash trial answer different questions. Include both when the risk warrants it.
Sharp points and edges
Inspect accessible surfaces before and after attachment, wash and pull testing. A fractured component can create a sharp condition even when the original part passed. Escalate any safety-related finding independently of ordinary appearance defect counts.
Wear and care trials
Have representative garments worn, opened, closed and laundered according to the care instruction. Check waistband comfort, fly operation, skin contact, noise, snagging and marks on adjacent surfaces. Instrumented tests are necessary for controlled comparison; practical wear can reveal interactions the component test did not anticipate.
Chemical and Market Compliance
Denim hardware composition and surface chemistry are market-access issues as well as quality issues. The applicable requirements depend on destination, age group, component accessibility, skin contact, intended use and current law. A supplier statement marked “eco-friendly metal” is not a compliance program.
Nickel release in the European Union
Entry 27 of Annex XVII to REACH specifically identifies garment items including rivet buttons, tighteners, rivets, zippers and metal marks when used in direct and prolonged skin contact. The restriction is based on nickel release, not merely total nickel content. Whether a particular garment component has the relevant contact should be assessed for the actual product.
Children’s apparel in the United States
US Consumer Product Safety Commission clothing guidance explains that accessible components of children’s products, including painted or metal buttons, zippers and snaps, can be subject to lead content or surface-coating requirements. Attachment failures can also create a product hazard. Children’s products need a market- and age-specific compliance review, accredited testing where required and proper certification.
Buyer restricted-substance lists
Retailers and brands may control additional substances or use stricter limits than the legal baseline. Obtain the current restricted-substance list before placing the hardware order. The test report should identify the exact article, color or finish and production lot; a report for a visually similar component is not evidence for a substituted part.
Document traceability
Keep supplier identity, article code, bill of materials, purchase lot, declarations and laboratory reports linked. Plated finishes can involve different chemical routes, so one base component offered in several colors may require finish-specific evidence.
This section is a product-development framework, not legal advice. Brands should obtain a current compliance protocol from a qualified laboratory or adviser for each destination and product category.
Write the Hardware BOM and Tech Pack
A photograph pasted into the denim tech pack is not enough for repeat denim hardware production. Give every component a controlled identity.
The denim hardware bill of materials should include:
- component name and function;
- brand or supplier;
- supplier article and mating-part codes;
- base material and construction;
- diameter, length, tape width or other key dimensions;
- finish name, internal finish code and approved master;
- logo artwork, relief direction and orientation;
- post, tack, prong or washer specification;
- setting die and machine reference;
- quantity per garment and spare allowance;
- placement drawing and reference measurements;
- reinforcement and material-stack detail;
- size-dependent zipper or component rules;
- required test methods, limits and report timing;
- destination-market compliance requirements;
- approved sample, revision and approval date;
- substitution rule.
Placement drawings
Dimension from stable construction lines, not from a raw cut edge that disappears during sewing. For paired rivets or studs, define spacing and orientation. For repeated layouts, provide a full-size template or digital placement file and state how it changes by size.
Inside construction
Show the reverse side. The factory needs to know whether a washer, reinforcement patch or backing layer is required and whether it must be hidden by lining or pocketing. An outside rendering cannot communicate this.
Approved physical master
Seal one loose component set and one attached washed example where possible. Photograph both under controlled light, but retain the physical reference for color, hand, relief and edge quality. Digital color values are not reliable descriptions of metallic finishes.
Denim Hardware Sample Approval Workflow
1. Confirm the design brief
Define component type, visual direction, logo, quantity, garment location, fabric, wash, market and target cost. Decide which items are functional and which are decorative.
2. Review supplier options
Compare stock articles before commissioning custom molds. Check dimensions, finish range, minimum order, tooling cost, sample timing, bulk lead time and test documentation. A stock base with a custom logo may control risk better than a completely new mechanism.
3. Approve artwork and tooling
Review a dimensioned drawing, not only a logo file. Confirm relief, orientation, edge radius, finish and the mating component. Tooling approval should state who owns the mold and how long it will be retained.
4. Make loose component samples
Inspect finish, logo and dimensions. Assemble trial parts to the production material stack using the intended dies. Reject obvious incompatibility before making a full garment.
5. Test the attached assembly
Assess attachment strength, operation, rotation, sharp edges and fabric damage. Test representative positions because a waistband, pocket corner and single-layer leg panel have different stacks.
6. Run the complete wash
Process the actual sample garment. Inspect wet and dry appearance, staining, corrosion, denting, finish loss, slider operation and contact marks. Repeat critical mechanical tests after the wash when the requirement calls for it.
7. Approve the pre-production sample
Verify component identity, placement, size rules and inside construction on the final pre-production garment. Update the BOM and drawings to match the approved result.
8. Confirm bulk hardware before use
Compare incoming lots with the master and review required reports. Conduct first-piece setting approval on bulk fabric before releasing the line.
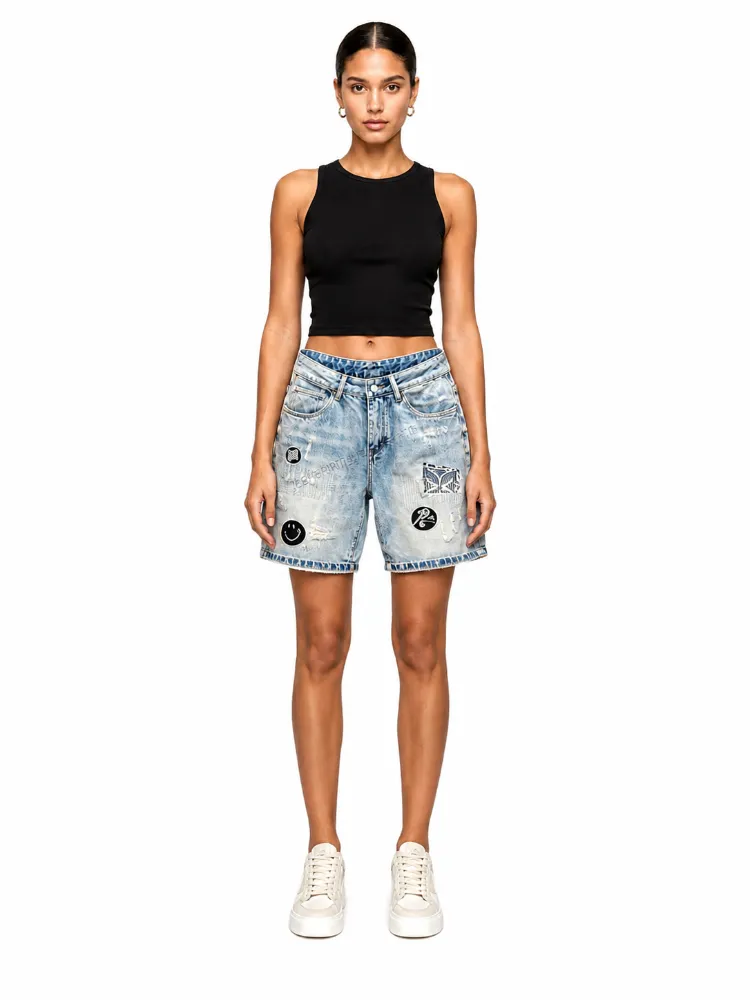
Bulk Production and Denim Hardware Inspection
Incoming inspection
Verify supplier, article, finish, quantity, mating parts and packaging. Sample dimensions and appearance across cartons or batches. Segregate lots so an approved finish is not mixed with a later variation. Store components dry and protected from chemicals or condensation.
First-piece setting
At the start of each style, component lot, machine or construction change, approve a first set. Inspect outside and inside, measure placement, operate the closure and perform the defined attachment check. Record die and machine identity.
In-line control
Inspect at intervals rather than waiting for final packing. Look for tilted caps, loose rotation, cracked backs, damaged fabric, missing pieces and finish scratches. Monitor the die face for wear and accumulated residue. Stop and contain production when the trend changes.
Post-wash inspection
Recheck count, attachment, appearance and operation after finishing. Open every sampled zipper and closure. Examine pale areas around metal for migration, the reverse side for corrosion and adjacent panels for impact marks.
Final random inspection
Classify findings by their effect on safety, function and saleability. A sharp broken component or detached part in a risk-sensitive product should not be averaged with cosmetic scratches. The brand’s defect manual should show photographs and escalation rules. Apply the wider sampling process described in the denim quality inspection guide.
Needle and metal detection
Intentional metal hardware affects product-detection procedures. Factories should use equipment, calibration and zoning appropriate to the product and buyer protocol. Hardware count control does not replace broken-needle control, and a detector response should not be dismissed simply because the garment is designed with metal parts.
Diagnose Common Denim Hardware Failures
| Failure | Possible causes | What to inspect |
|---|---|---|
| Button pulls off | Wrong tack length, poor lock, large hole, weak or unreinforced stack | Button/tack compatibility, cross-section, hole, die, setting force and fabric tear |
| Button rotates | Insufficient engagement, compressed stack, damaged hole or wrong post | Internal lock, tack length, stack thickness and setting consistency |
| Cap dents or logo flattens | Wrong die profile, excessive force, weak shell or wash impact | Die face, pressure, component construction and wash protection |
| Fabric tears around rivet | Attachment too close to edge, weak wash area, large hole or no reinforcement | Placement, remaining fabric strength, backing and post geometry |
| Rivet back is sharp | Incorrect mating part, split post, off-center die or excessive setting | Reverse formation, die alignment and component lot |
| Zipper jams | Fly misalignment, tape shrinkage, residue, damaged teeth or excessive lateral load | Sewn fly geometry, chain, slider, wash residue and pattern ease |
| Fly opens during wear | Unsuitable slider lock, slider damage, chain mismatch or high tension | Slider function, chain article, fit and repeated operation |
| Zipper ripples | Tape and denim shrink differently, feed is uneven or zipper is sewn under tension | Pre/post-wash lengths, sewing method and material relaxation |
| Finish peels | Poor preparation, incompatible coating, setting damage or harsh wash | Loose component, set component, pre-wash and post-wash progression |
| Rust or staining appears | Base metal exposure, damaged coating, trapped chemistry or poor rinsing/drying | Edges, holes, underside, wash neutralization and storage humidity |
| Studs detach in wash | Short prongs, wrong backing, poor clinch, stretch fabric or drum impact | Prong formation, stack, layout, process load and post-wash pull |
| Mixed metal colors | Different suppliers, uncontrolled finish names, lot mixing or wash response | Approved set, incoming lots and components after the same wash |
When a denim hardware failure occurs, preserve failed and passing samples from the same lot. Record where the break happened: inside the component, at the lock, through the post, around the fabric hole or in the surrounding cloth. “Failed pull test” is an outcome; the fracture location is evidence about the cause.
Cost, MOQ and Repeat-Order Planning
Denim hardware cost includes more than the unit price. Custom molds, logo sampling, plating minimums, finish development, testing, spare quantities, setting dies and air freight for late components can all affect the program.
Stock versus custom articles
A stock mechanism with an available finish can shorten development and reduce minimums. A custom face or puller can add brand identity while using a proven functional base. Fully custom geometry makes sense when the design value supports tooling, testing and repeat volume.
Finish minimums
Hardware suppliers may require a plating or coating batch larger than one garment order. Coordinate colors across styles where appropriate, but do not force one finish onto products whose wash chemistry makes it unstable. Ask how unused components will be stored and whether the finish can be reproduced later.
Component lead time
Logo approval and tooling should begin early enough to support the pre-production sample. Ordering hardware before the wash and construction are stable creates another risk: the post length, finish or zipper length may be wrong by the time the garment is approved.
Repeatability
Keep supplier codes, master samples, test reports and tooling ownership records. If a supplier changes base material, plating route or factory, require notification and appropriate reapproval. A matching photograph does not prove that the repeat lot uses the same construction.
For low-MOQ programs, simplify intentionally. Use fewer metal finishes across the collection, proven zipper lengths and one compatible button/rivet family where design permits. Simplification should reduce uncontrolled variables, not remove functional testing.
Denim Hardware Approval Checklist
- Every component has a supplier and article code.
- Mating parts are identified as one approved set.
- Dimensions, base material and finish are documented.
- Logo artwork and orientation match a physical master.
- The material stack is defined at every attachment location.
- Tack, post, prong or barrel length suits the compressed stack.
- Reinforcement and hole method are shown in the construction detail.
- Setting dies and first-piece approval are controlled.
- Placement rules cover all sizes and length variants.
- Zipper length and slider type match the fly pattern.
- Closures operate smoothly in the washed garment.
- Attachment strength uses an agreed method and limit.
- Sharp edges, rotation and fabric damage are checked.
- Finish, corrosion and staining are reviewed after the actual wash.
- Chemical requirements match the destination and product age group.
- Reports are traceable to the exact component and finish.
- Incoming, in-line and post-wash inspections are defined.
- Substitution requires written review and reapproval.
Frequently Asked Questions
What hardware is used on denim jeans?
Common jeans hardware includes a tack button, pocket rivets and a fly zipper. Depending on the design, jeans may also use snaps, hooks, adjusters, eyelets, buckles, studs, metal badges or decorative fasteners.
What is a jeans tack button?
A jeans tack button is an attached waistband closure whose visible button body locks onto a tack or nail passing through the waistband material. The button, tack length, fabric stack, hole and setting die must be approved as one system.
Why do jeans have rivets?
Rivets are traditionally used to reinforce selected high-stress areas such as pocket corners. In fashion denim they may also be decorative. Placement, fabric strength, reinforcement and attachment quality determine whether a rivet strengthens or damages the garment.
How is a jeans button pull test performed?
The attached button is loaded using a defined fixture, direction, rate and test method, and the maximum force or failure behavior is recorded. The method, specimen construction, conditioning, sample count and acceptance limit must be agreed; there is no universal force suitable for every garment.
Why do jeans buttons fall off?
Possible causes include an incompatible button and tack, incorrect tack length, an oversized hole, insufficient setting force, a worn or wrong die, inadequate reinforcement or fabric weakened by washing. The failed assembly should be examined to locate the actual break.
What zipper is best for jeans?
There is no single best zipper. The zipper should match the fly length, fabric weight, fit tension, wash process, appearance and performance requirements. Metal closed-end zippers are common in traditional jeans, but other chain types can be suitable for specific products.
Should denim hardware be tested before or after washing?
Both stages can be important. Pre-wash testing checks the component and initial attachment; post-wash testing reveals changes caused by shrinkage, chemistry, abrasion, impact and drying. The finished garment should always be inspected and operated after its actual denim wash.
Can the same hardware be used for every denim wash?
Not automatically. A component that performs well in a dark rinse may corrode, stain or lose finish in a bleach or high-abrasion process. Approve each hardware finish with the intended base fabric and wash route.
Does denim hardware need nickel testing?
It may, depending on destination market and skin contact. EU REACH restricts nickel release from listed garment metal items intended for direct and prolonged skin contact. The product should be assessed against current market requirements by a qualified laboratory or compliance specialist.
How should custom logo buttons be specified?
Provide a dimensioned artwork drawing, relief direction, orientation, diameter, base construction, material, finish, mating tack and approved physical sample. Confirm that fine artwork remains clear after tooling, plating, setting and garment washing.
What should be checked during denim hardware inspection?
Verify component identity, finish, count, placement, alignment, setting quality, reverse-side formation, attachment, sharp edges and function. After washing, also check corrosion, staining, denting, coating loss, zipper operation and marks on adjacent fabric.
Can factories substitute visually similar buttons or rivets?
Not without approval. Similar-looking parts can use different materials, locking geometry, post lengths, finishes or chemical processes. A substitution should be reviewed against the BOM, garment construction, wash, testing and market requirements.
Final Takeaway
Reliable denim hardware comes from controlling the whole assembly. Choose the component for its function and appearance, match it to the real material stack, attach it with the correct tooling, expose it to the intended wash and test the failure modes that matter. Then preserve the supplier article, physical master and process record so the next order is a repeat, not a new experiment.
Brands developing custom jeans, jackets, shorts or embellished denim can send Luokugg the design, quantity, fabric, wash reference, logo artwork, hardware direction, destination market and required testing through the custom denim quotation form. Early hardware review allows construction, wash development and component lead times to be planned together.